Page 1
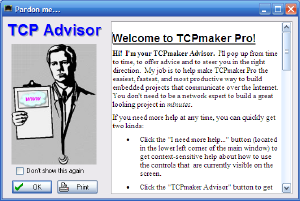
This friendly fellow, your TCP Advisor, greets you when you start TCPmaker. He starts out by giving you a summary of the TCPmaker design process.
Then, after you close this window, he'll still be there in the background, keeping an eye out for potential problems, and available to give you advice whenever you need it.
Click on the image for page view.
Page 2
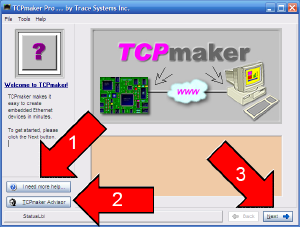
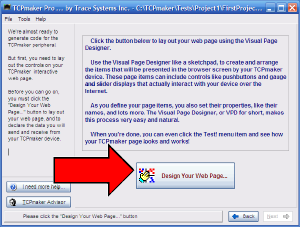
This is TCPmaker's main screen. The first thing you may notice is that it contains 2 help buttons:
- The "I need more help" buttong tells you things like what you need to do on screen to advance through the TCPmaker wizard.
- The TCP Advisor button brings up that helpful guy we just met. He'll help you figure out what to do in Ethernet terms: for example, what would be a good choice right now?
We're ready to go on, so click the "Next" button.
Click on the image for page view.
Page 3
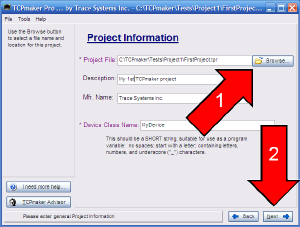
Once TCPmaker gets all the information it needs to generate code, it will place the code for each compiler that you select into subdirectories below the main project directory.
That's why we strongly suggest that you click the Browse button and create a new, empty directory to hold your project file, and where TCPmaker can create the subdirectories for your generated code.
Then, click the "Next" button.
Click on the image for page view.
Page 4
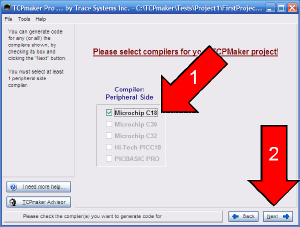
Click on the compiler(s) you want to use, and click the Next button
Click on the image for page view.
Page 5
TCPmaker has now set up, and partly filled in, the directory tree for each compiler your project will use.
Now you need to design the web pages that your device will display on a browser. Click the button marked "Design Your Web Page..." to bring up TCPmaker's Visual Page Designer, which is the subject of our next tutorial.
Click on the image for page view.
|